

Vanguard guide
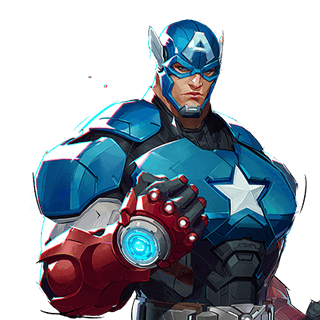
Captain America
Captain America is a mobile dive Vanguard who wins through pressure, displacement, soft engages, backline disruption, and timely peel instead of sitting main and punching tanks all game.
Your job. Stage around the enemy, force support cooldowns, help friendly divers collapse, intercept flankers when your supports need help, and use Freedom Charge to engage, answer threats, or stall.
Pick Captain America when your team can surround the enemy with dive pressure, when you need a Vanguard who can harass poke/backline heroes, or when your supports need a mobile tank who can peel without becoming stationary.
Source: Paz Captain America comprehensive guide (opens YouTube in a new tab)
The examples follow the source review. Hero kits and balance may differ from the current game; use the decision process and check current ability values in-game.
General philosophy: do not sit main
Captain America makes a fight easier by changing where the enemy has to look. The source guide warns against spending the whole match in main, punching the opposing tank: that leaves his mobility and displacement doing very little. Stage around the enemy instead, force attention away from the frontline and decide whether the opening calls for a kill attempt or another reset.
Choose that job from the team fight rather than from a fixed route. Psylocke, Daredevil, Iron Fist and Black Panther can use help surrounding the backline; if your own supports are struggling, the more useful route may intercept an enemy flanker before the engage lands. Intelligent staging lets Cap move between those responsibilities without becoming a stationary frontline tank.
Sentinel Strike: punch into shield pressure
Sentinel Strike turns a close approach into sustained shield pressure. In the source version of the kit, melee punches deal 40 damage and build the charges shown beneath the reticle. Four charges, or punching a target twice, unlock mini shield throws dealing 45 damage per hit. Those throws automatically seek enemies near the crosshair rather than ricocheting like Vibranium Energy Saw.
Their reach is about 25 meters, so treat them as a chase tool after closing distance, not as a long-range poke plan. The guide also notes that aiming a little to the target's right gives more generous homing than aiming to its left. When preparing the sequence, Groot walls, Loki clones and Moon Knight ankhs can build Sentinel Strike charges; inanimate shields such as Emma Frost's cannot.
Leading Dash and Super-Soldier Slam
Leading Dash provides the movement that keeps this close-range plan working. The source guide describes a 33% sprint speed bonus without a cooldown or energy meter. Sprinting between mini shield throws helps Cap stay with a retreating target, but rushing the inputs can cancel a throw and lose its damage. Listen for the shield impact before throwing again. Hold or toggle sprint is a comfort choice; getting the pressure-and-reset idea right matters more than small sprint optimizations.
Jumping while sprinting opens Super-Soldier Slam, which deals 30 damage in the source and launches enemies upward. When already close, two punches into a slam set up the mini shield follow-up. When another diver commits first, timing the slam with that entry can help burst a support instead of starting an isolated fight.
The same slam can provide a way out. Its stated 12-second cooldown makes the decision important: using it for a small amount of extra pressure may remove the escape you need a moment later. Plan the exit while you are choosing how to enter.
Living Legend: shield for stuns and clutch blocks
Living Legend is protection to spend on a specific danger. It deflects projectiles in random directions, unlike Daredevil-style aimed deflections; melee and beams do not reflect back, although some beam damage can still be blocked. The source gives the shield 350 health and a recovery rate of 50 health per second while put away. Lowering it creates a short lockout, and breaking it creates a longer wait, so repeatedly flashing or exhausting it has a cost.
Use that protection for the moment that would stop your route: a Luna snowball, a Hela stun or another dangerous interruption. It can also cover friendly supports from projectiles and certain ultimate situations, including Iron Man and Magneto. Ordinary poke does not always justify spending it. Better pathing, cover, health packs and support healing can preserve the shield for the stun or clutch block that matters.
Liberty Rush: finish or escape, not both
Liberty Rush forces a choice between committing damage and preserving an exit. The source describes a 12-meter charge dealing 30 damage on a 10-second cooldown, usable whether Living Legend is raised, lowered or broken. During the dash, crowd-control immunity can dodge a Luna snowball, Doctor Strange ultimate or even Jeff ultimate timing.
Unlike Psylocke's dash, however, it stops when it hits a target. Do not plan to damage through someone and escape with the same cast. On a hard kill attempt, spend it to finish quickly; on a soft engage meant to draw resources, saving it lets you dodge crowd control and leave after the enemy responds.
Vibranium Energy Saw and the core combo
Vibranium Energy Saw supplies the larger shield hit that turns contact into real finishing pressure. It deals 70 damage on the first hit in the guide, then can ricochet up to three times with reduced damage on each bounce. A throw into the ground near a target can still bounce into them, making the legs a more forgiving aim point than insisting on a perfect direct hit.
Timing matters as much as aim. A throw launched too early from a hidden staging position announces the approach and gives supports time to heal the damage; never weaving it in gives away pressure and finishing power. The source combo is sprint, jump, Vibranium Energy Saw, wait, left click, Liberty Rush, then left click. Practice the rhythm in the range before asking a crowded fight to teach it to you.
Use that committed sequence when a friendly diver is ready to help secure the kill. A soft touch has a different purpose: apply shield-throw and slam pressure, read the response and retain Liberty Rush to leave or dodge crowd control. The abilities are straightforward individually, but combining all of them without an intended outcome makes the engage unnecessarily hectic.
Freedom Charge: mini support ultimate
Freedom Charge can support an entire team's timing rather than only making Cap harder to kill. The source describes a 30% movement speed bonus, 150 bonus health for Cap on cast and 100 for nearby allies, followed by further bonus health radiating from Cap while it remains active. Start near teammates when possible so the immediate health and the trail or aura can help them through the exchange.
Its three jobs are engaging, answering medium threats and stalling. As an engage, the speed carries Cap and the team into the backline without spending a stronger support ultimate first. As a counter, the durability can answer Star-Lord ultimate, Psylocke or Black Panther pressure, or a backline that urgently needs protection. As a stall, it lets Cap survive and bump enemies around while buying objective time.
Those jobs require noticing allied danger. Consider enabling ally health bars: tanks do not naturally get the same critical-health prompts as supports, yet this ultimate can save teammates like a support tool. Match the cast to what the team needs, and keep the more specific limits in the ultimate plans below in mind.
Counters and annoying matchups
Matchups change whether a clean route is available, not just which tank wins a direct trade. The guide argues that skilled use of Liberty Rush and Cap's mobility can avoid key Emma Frost crowd control, so it does not treat her as an automatic hard counter. It calls out Peni Parker and The Thing as more troublesome Vanguard opponents. There is also a coordination problem: teammates expecting a simple Magneto, Emma or Strange front-to-back brawl may not understand what a Cap pick is trying to create.
Several Duelists make staging harder. Winter Soldier can dash into Cap and force a retreat without mobility; Namor's turrets are difficult for Cap to clear alone, although his larger health pool absorbs more than a squishy diver's would. An accurate Punisher can shred Living Legend quickly. Iron Fist and Daredevil can mark or track the approach, removing the freedom to choose a clean angle.
Do not assume Freedom Charge solves those threats by itself. Ultron is singled out as an answer whose pressure can burn through the bonus-health plan. Adapt the route and the purpose of the ultimate rather than spending the same resources into every opposing composition.
Synergies: surround and collapse
Look for teammates who can use the attention Cap creates. The source highlights Venom as the strongest tank partner: taking different angles and collapsing onto the same target can force support cooldowns immediately. Adding Angela puts another large health bar into that converging pressure. The Winter Soldier Team-Up lets Bucky reposition to Cap and is useful, but the guide does not make it the central reason to choose him.
Psylocke, Black Panther, Iron Fist and Star-Lord fit the surrounding-backline plan. Human Torch adds a different consequence: Cap's punches can make enemies retreat through Torch's fire zones. On support, Luna Snow is a strong pairing, while Mantis can make an engage more lethal without requiring Cap to overcommit. The shared requirement is follow-up that can arrive when the enemy turns.
VOD lesson: force cooldowns before kills
The Paulie VOD review shows why pressure and a finished kill are different outcomes. Cap stages away from main, waits for a friendly Psylocke flank and slams the supports once the backline becomes vulnerable. After a pick or a forced resource, he leaves rather than feeding and returns when another opening develops. The first touch creates conditions for the harder one.
The same review praises clearing room for a flanking Jeff, who can then establish a useful damage-and-healing angle behind the enemy. In chaotic triple-support fights, put out the fire that matters: threaten the right enemy, force support ultimates and use Freedom Charge so your supports can answer second. If a threat to your backline is already too committed or too far gone for you to peel, do not waste the whole window travelling to it; look for an equal or better play against the opposing backline.
Soft engage discipline
A soft engage is a limited pressure touch whose purpose is to force a cooldown. The VOD shows Cap reaching supports, drawing Mantis sleep or Luna snowball and using Liberty Rush or disciplined shielding to leave before the punish. Reaching the target does not automatically turn holding primary fire into the correct next action. Read what the defender spends and whether the real kill attempt is ready.
That first response changes the next fight. Sleep, snowball, runes, portals and other support tools that are no longer available make a return entry more dangerous. Even without personally killing the support, Cap can interrupt healing long enough for teammates to win the point or finish the tank. Keep the first touch shallow enough to survive, then let the accumulated pressure produce the opening.
A soft touch prepares the Psylocke collapse
In the source's Paulie review, Cap stages away from main and waits until the friendly Psylocke flank is ready before slamming the supports. The teaching decision is the wait: entering alone would spend the same tools without the coordinated backline pressure the example is trying to create.
After a pick or a forced resource, Cap leaves and looks for the next entry rather than trying to turn the first contact into an endless duel. The useful result is either the opening for the collapse or fewer defensive answers for the next touch. If your own supports need peel instead, the same route is not automatically the right job.
Try this next match
For your next match, name one enemy defensive cooldown you want to force before each soft engage, and keep a way out for its response. Review one entry afterwards: did you leave once the resource was spent, or did you turn a successful pressure touch into an unsupported chase?
Ultimates and matchups
Freedom Charge: Engage
Use Freedom Charge after a soft engagement or as your team is ready to move so Cap, divers, and follow-up damage can flood the backline together.
- Good against
- Backlines with forced cooldowns, Dive partners such as Psylocke or Black Panther, Teams that are slow to turn around, Fights where you want speed without spending a major support ultimate first
- Be careful into
- Opening before your team can follow, Using it far away from allies who need the bonus health, Ultron pressure that can burn through the sustain plan
Freedom Charge: Counter-threat
Treat Cap ultimate like a mini support ultimate into medium threats. Pop it near your team when enemy pressure lands and use the movement speed to escape or turn.
- Good against
- Star-Lord ultimate, Psylocke or Black Panther diving supports, Jeff Storm-style combo pressure, Moments where supports would otherwise spend a bigger ultimate
- Be careful into
- Huge fight-ending ultimates that need stronger answers, Using it after teammates are already split beyond the aura, Silently using it when your supports are already committing their ultimates
Freedom Charge: Stall
Use Freedom Charge to buy objective time, keep yourself alive, bump enemies around with shield interactions, and survive long enough for teammates to return or finish the fight.
- Good against
- Last-second objective contests, Overtime stalls, Messy fights where living is the win condition, Buying time for support ultimates or respawns
- Be careful into
- Stalling alone with no realistic team return, Running away from the objective trail value, Treating stall as permission to ignore cover completely
Sources and further reading
This lesson is written in our own words from Paz Captain America comprehensive guide (opens YouTube in a new tab).