

Vanguard guide
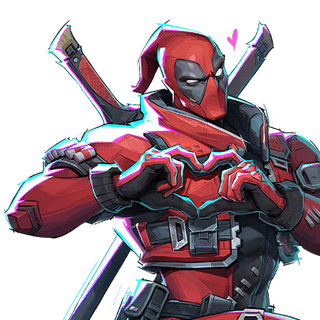
Deadpool
Tankpool is not a sit-main damage sponge. He wins through pressure, disruption, pacing, stance swaps, upgrade discipline, shield timing, and controlled aggression.
Your job. Force attention, make the enemy team uncomfortable, build style points, and cycle in and out of pressure without exploding.
Use Tankpool when your team benefits from chaos control: forcing cooldowns early, pressing supports, taking aggressive space, or stalling long enough to become impossible to ignore.
Source: Fifth's Tankpool video guide (opens YouTube in a new tab)
The examples follow the source review. Hero kits and balance may differ from the current game; use the decision process and check current ability values in-game.
Actual role: control chaos
Tankpool changes a fight by demanding attention without giving the enemy an easy kill. Fifth's guide does not treat him as a basic tank who stands in main, absorbs every shot and wins by comparing health bars. Pressure, disruption and pacing are the job: push enemies back from useful space, occupy supports so your Duelists can advance or force defensive cooldowns before the real commitment.
Sometimes the useful result is simply living long enough that opponents cannot ignore you. Every resource spent dealing with Tankpool is attention or protection unavailable elsewhere. Keep that pressure mobile by rotating angles, changing stances, backing out and returning when resources recover. Hard-forcing every entry without reading those limits can get him deleted, particularly after nerfs; controlled aggression is what makes the disruption repeatable.
Style points and upgrade discipline
Style points supply the upgrades that turn early pressure into a much harder threat to remove. Committing heavily before building them leaves Tankpool short of the sustain and output the plan relies on. Start by poking, pressuring corners and forcing resources while staying alive long enough to gain momentum. A fully upgraded Tankpool demands a different response from one who has not yet built any upgrades.
After a kill, take the picture. Close-range pictures provide more style points than distant ones, but ranged pictures are still useful; the action also supplies an invincibility frame. The source treats skipping that opportunity as giving up both progression and protection.
Fifth recommends Ban Hammer first because its upgraded damage applies even when enemies are not missing. Other choices still depend on the opposing composition. The E upgrade adds attack speed for guns and swords, reduces damage taken by allies and taunts enemies. The dash upgrade gives a second dash, while gun upgrades increase damage. Choose how to build the next pressure cycle rather than treating every upgrade as interchangeable.
Master the whole kit: pistols and swords
Pistols and swords have their own cooldowns, so remaining in only one stance leaves useful tools idle. Use pistols at long range, then change to swords when opponents enter the effective close range. Sword pressure is especially useful against targets moving too much for comfortable aim, and a bouncing Tankpool can make the backline's attempts to hit him difficult.
That close threat also moves people. When supports retreat from a dash or sword approach, your Duelists gain space to work even before a kill occurs. Mobility must cover both halves of that exchange: getting in is useful only if you can also leave. If you are stuck, taking too much damage or about to die, use the dash and the rest of the kit together to disengage instead of treating every movement tool as another attack.
Dash range and sword combo
The source shows a dash radius of about 10 meters and builds the sword sequence around dash, jump, slash. The jump makes the movement quicker and more fluid than the no-jump version. Practice that order slowly first, then increase the pace until the faster version is natural rather than an unreliable burst of inputs.
Repeat the practice without E and with E, because the attack-speed increase changes the timing and makes the sequence much faster. Sword attacks can critically hit, so aim for the head when the opening permits. A recurring pressure pattern is to place the gun ultimate on a support, then switch to swords to finish more easily; the stance change serves the target and the timing rather than existing as a combo for its own sake.
Ban Hammer discipline
Ban Hammer's value depends on understanding what happens before and after its upgrade. In its base form, dropping it on a target grants immediate bonus health and steady healing over time. It also marks the taunted target with an icon. When that target shoots and misses, it immediately takes damage and Tankpool gains further bonus health, punishing a panicked response while making him harder to remove.
The upgrade adds heavy damage over time to those base effects. Damage continues every second even if the target never shoots or misses; misses then make the punishment worse. That is why the source favors it as an early upgrade instead of relying entirely on the opponent to make a mistake.
Apply that threat to the enemy team's lifeline. An upgraded Ban Hammer on a Strategist creates constant pressure, while missed shots or healing attempts add further punishment and disrupt the support's rhythm. The specific ultimate matchups below matter: a target who can completely disengage, such as Jeff going underground and stopping healing, is a different opportunity from an exposed support still trying to sustain the team.
Sword ultimate usage
Fifth uses the sword ultimate less often, but gives it a clear purpose when it is chosen: survival. The katana ultimate supplies a movement boost and chunks of healing over time, buying room to stall the point or live through heavy focus fire.
Judge it by the time that survival creates for teammates to recover momentum. Staying alive can keep the objective contestable even when you are not the one producing a clean finish. If you can already disengage safely or the fight is lost without any realistic follow-up, preserving the ultimate may matter more than extending the scene.
Plushie Shield discipline
Plushie Shield is a short tactical window, not a replacement for Doctor Strange's shield. The source gives it 300 health at base and 400 after upgrading, with a small increase in radius. A Duelist can destroy it in roughly two seconds, so choosing the job before placing it is more useful than expecting permanent cover.
That job might be denying a large enemy ultimate, crossing a dangerous angle, cutting a support's healing line or briefly blocking damage so Tankpool can reset and receive healing. Healing cannot pass through it, which also creates opportunities to isolate a support inside or outside the shield. Relative position matters in the Doctor Strange interaction: it can block while the relevant players are separated by the shield, but the situation changes if Strange walks inside.
Use the denial deliberately, then move before it falls. The matchup notes distinguish useful targets such as Magneto ultimate from Phoenix ultimate, which cuts through. Dropping it without a particular line-of-sight or ultimate-denial purpose gives away a limited tool without creating the window the team needs.
Passive: Healing Factor
Healing Factor can save Tankpool from massive burst or a lethal one-shot ability by granting brief invincibility and rapid healing. It functions like a second life, but the source assigns it a strict 45-second cooldown and notes that you cannot fully choose when it triggers.
Treat that automatic protection as a limit to manage rather than a reason to ignore danger. Avoid spending it early on pressure you could have escaped; living carefully preserves the safety margin for the exchange where leaving is no longer simple.
Tank discipline in full fights
The full-fight lesson returns to limits rather than adding another damage sequence. Fifth's example is about surviving and stalling the objective against the odds. Even when the ending is messy, staying alive can be what gives the team one more chance to recover.
That does not require Tankpool to finish every target himself. Build the upgrades, choose the stance, spend protection for a specific window and get out when the pressure has done its work. Keeping the fight alive until teammates can swing it is a real outcome; repeatedly forcing the clean finish at the cost of your life removes it.
Practice scenario: build pressure, spend a window, reset
This is a hypothetical practice sequence built from the guide's advice, not an extra event attributed to its video. Before the hard fight, use pistols and corner pressure to build style points rather than committing immediately at zero upgrades. After an available kill, take the picture for progression and the invincibility frame; then reassess whether the next entry is actually ready.
When an exposed support is a viable target, upgraded Ban Hammer can provide pressure that swords follow up at close range. Keep a route out and use a short Plushie Shield window to reset if incoming damage becomes too much. A retreating support and resources forced can still be useful space for your team; do not spend the remaining dash chasing when the next pressure cycle depends on surviving.
Try this next match
For one match, check your upgrades and exit before each heavy commitment. After pressuring a support, deliberately look for the point where returning to cover would preserve the next cycle. Review one death afterwards and ask whether you forced attention successfully but stayed after your resources were spent.
Ultimates and matchups
The Ban Hammer / Gun Ultimate
Prioritize Strategists because they are the enemy team’s lifeline. Upgraded Ban Hammer creates constant damage, punishes missed shots or missed healing attempts, and breaks support rhythm.
- Good against
- Enemy Strategists, The Punisher ultimate, Moon Knight ultimate if it misses targets, Squirrel Girl, Hitscan heroes, Ultron ultimate, Jeff while he is actively healing
- Be careful into
- Jeff if he goes underground and stops healing, Targets who can completely disengage before the pressure matters, Low-value DPS targets when an enemy support is available
Katana / Sword Ultimate
Use it mainly as a survival ultimate: movement speed plus healing over time lets you buy time, stall point, or live through heavy focus fire.
- Good against
- Heavy focus fire, Objective stall situations, Moments where your team needs time to re-enter, Chaotic fights where staying alive creates more value than chasing damage
- Be careful into
- Clean disengage situations where you can save the ultimate, Fights already lost with no team follow-up, Using it only for damage when survival is the real value
Magical Unicorn Shield / Plushie Shield
Use it as a short, tactical denial tool: block an ultimate, cut healing line of sight, isolate a support, or buy a brief reset window.
- Good against
- Magneto ultimate, Support healing lines, Isolating a support inside or outside the shield, Brief damage blocks while resetting, Taking space through a dangerous angle
- Be careful into
- Phoenix ultimate because it cuts through, Duelists who can shred the 300-400 health shield quickly, Treating it like permanent cover, Dropping it without a specific line-of-sight or ultimate-denial purpose
Sources and further reading
This lesson is written in our own words from Fifth's Tankpool video guide (opens YouTube in a new tab).