

Decision Making · 1:02:48 · Cloak & Dagger
When to Heal Versus When to Do Damage
A long-form lesson on damage weaving, triage, resource pressure, and rank adaptation, using Cloak & Dagger to show why a Strategist must use the whole kit.
What you will learn. You will make a fast danger assessment before each heal or damage choice and adapt the balance as enemy pressure becomes faster and more coordinated.
Source-era note. The opening rank percentages are illustrative, not a required formula. Current Cloak & Dagger values may differ; use the danger and opportunity checks rather than fixed output ratios.
A health bar shows missing health; it does not tell you who is in the most danger. Combine it with cover, enemy attention, available escapes and the speed of the lobby’s damage. Cloak & Dagger illustrate why this matters: healing and pressure are parts of one cycle, and either can be the wrong action when you keep doing it after the situation changes.
Adapt output to the lobby
Lower-pressure games leave larger windows to create eliminations yourself. As enemy damage becomes faster and teammates are punished sooner, healing and preemptive mitigation consume more of your attention.
Triage danger, not the health bar alone
A nearly full tank in a chaotic fight often needs help killing the immediate threat more than the final sliver of health. A lower ally in cover may be safer than a healthier ally currently focused by multiple enemies.
Use the full hero cycle
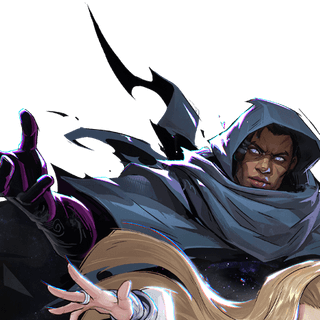
Cloak’s pressure and amplification exist alongside Dagger’s healing. Switching forms and using independent cooldowns creates more value than remaining on one form because it feels safe.
Pressure pulls resources
Damage does not need to secure the elimination immediately. Forcing an enemy support ultimate, escape, or defensive cooldown can make the next objective fight much easier.
Read the situation, choose the action
Use these as decisions to revisit during the fight. If the situation changes, change the action with it.
| When | Do |
|---|---|
| An ally is critical, exposed, or actively focused | Heal or mitigate immediately, especially if they lack their own escape. |
| Allies are stable and a vulnerable enemy or deployable is available | Switch to damage or amplification until the danger state changes. |
| Friendly sustain covers the team | Use the temporary safety to pressure, blind, amplify, or secure eliminations. |
| A diver commits to you | Use survival resources and fight back; the frontline must self-manage until you are safe. |
Hypothetical example: two health bars, two different risks
A damaged teammate is safe behind cover while a healthier ally is being focused in the open. Prioritize the immediate danger instead of sorting teammates only by missing health. Once that threat is stable, a vulnerable enemy or deployable can make pressure the useful next action.
If a diver then commits to you, protect yourself and fight back while the frontline self-manages. Return to team healing when you are safe. These transitions use the whole kit; they do not justify ignoring healing needs or staying in a pressure form throughout a fight.
Turn it into a habit
Before switching to damage, check health, cover, enemy attention and defensive tools. Review one switch that went well and one that did not, naming the danger information you had at the time.
Two-second danger scan
Before switching to damage, check ally health, cover, enemy attention, and available defensive cooldowns.
Success check: You can explain why the ally was safe for the next two seconds.
Full-kit cycle
Use at least one healing tool and one pressure tool during every organized fight.
Success check: Neither form nor a major cooldown remains unused simply because you defaulted to healbotting.
Resource-forcing log
Record enemy escapes, defensive cooldowns, and ultimates forced by your pressure.
Success check: You begin valuing pressure that creates the next winning window even when it earns no final hit.
Return to the source moments
These links use the original video's verified checkpoints. Examples above are practice scenarios, not additional events attributed to the video.
- Rank changes the balanceThe required healing-to-damage mix increases as incoming pressure becomes faster. (opens YouTube in a new tab)
- Friendly sustain enables pressureThe active ultimate covers healing while Cloak attacks and separates the enemy support. (opens YouTube in a new tab)
- Offensive ultimate timingAn early use creates safety, pressure, and a pincer before the enemy can stabilize. (opens YouTube in a new tab)
- Rapid weave exampleBubble, damage, healing, and target selection change repeatedly with the fight state. (opens YouTube in a new tab)
- Force the support ultimateDamage amplification pulls Luna’s ultimate before the decisive objective moment. (opens YouTube in a new tab)
- The triage summaryHeal allies in real danger; otherwise help remove the threat in front of them. (opens YouTube in a new tab)
Watch source video
Questions for your next replay
- Was the ally actually in danger, or merely missing health?
- Which offensive cooldown remained unused while I healed?
- Did my pressure force a resource before the objective fight?
- Has the lobby’s damage speed changed enough that I need to adjust my healing priority?